



Join Future Light & Save
Get Your First Order Discount, Early Access & Loads More!
Why join?
-
First Order Discount!
-
Exclusive Promos & Limited Drops
-
First Access to all Sales
-
Lighting Tips, Inspo & More
About Us
-
Operating since 2009 — 16 years
-
53,000+ Orders & Counting
-
35,000+ Happy Clients
-
7,000 products — More Added Daily


If you’ve removed a switch, moved a point, or simply have an unused opening on your wall, this indoor blank plate is a neat, practical way to close it off safely and keep your space looking finished—ideal for clean, functional setups in offices and similar indoor areas.
This blank plate switch cover is a practical choice for finishing an unused wall point in a kitchen or office. Use it where a switch has been removed or relocated, such as beside a work area or along an office corridor. Its plain white finish helps the wall look consistent rather than leaving an open or unfinished position, making it a sensible indoor switch solution for tidy, functional spaces.
Specifications
- Material: Plastic
- IP Rating: IP20 – Indoor Use
- Dimensions: Length = 126mm, Width = 80mm
PROMPT 1 — Corridor wall blanking beside office door
Functional office detail in use
Prompt:
Create a believable South African office corridor scene with exactly 1 installed “White Indoor Blank Plate Switch Cover” closing an unused wall switch opening beside a door. The blank plate is fixed flush to the wall at typical switch height (around 1,100 mm above the finished floor), aligned level and centered to the removed opening. Include a narrow view down the corridor showing scale with skirting boards and door trim; no other wall openings are altered. Use a daylight-balanced look with subtle natural reflections on painted surfaces.
Product preservation:
Use the uploaded image as the exact manufactured product. You may change its position, uniform apparent scale, whole-object orientation and camera viewpoint. You must not change its design, mounting method, physical proportions, component shapes, relative sizes, counts, spacing, materials or finish. Perspective and scene lighting may change how it appears; they must not change what it is. Preserve all original construction details. Preserve the plastic white blank switch-plate cover with length 126mm and width 80mm, its flat flush face profile, clean edges, and the complete blanking plate geometry with no added switch parts.
Environment details:
- Setting: office corridor with muted off-white painted walls and light grey floor tiles; the main colour feature is a slightly dusty sage door edge/trim accent on one door, and an incidental detail is a lightly scuffed baseboard near the camera.
- Scale & installation: camera at about 1.6 m eye level, facing down the hallway so the plate is clearly readable; the switch cover is mounted flush to the wall beside the door at ~1,100 mm above the floor, with no visible cable tails, and no other fixtures changed.
Lighting:
- The product is non-illuminating (switch cover), so show only ambient office daylight from an off-frame window; keep the wall and plate naturally lit with gentle contact shadow only where the plate meets the wall. Use restrained exposure so the plastic texture and matte white finish are readable.
- Use neutral photographic white balance with accurate material colours. Retain the fitting's actual light colour and plausible local spill, without an overall yellow/orange cast, sepia grading or a blue, green or magenta counter-cast. A soft shadow edge under the plate should match the ambient light direction.
Mood:
Quiet daytime workday feel—someone has tidied a removed switch point so the hallway looks finished.
Camera guidance:
- 800×800 framing: medium close-up along the corridor wall, camera slightly oblique (about 20–30°) to show the plate flush and level, with door trim and skirting boards providing scale.
- Focus on the blank plate; shallow depth of field keeps the corridor doors soft while preserving crisp edge definition and true white colour.
- Natural cropping that keeps the plate unobstructed; no exaggerated lens distortion.
PROMPT 2 — Desk-side kitchen wall tidy-up
Practical close detail in a working corner
Prompt:
Photograph a lived-in office kitchenette workspace with exactly 1 installed “White Indoor Blank Plate Switch Cover” on a plain kitchen wall next to a small counter and under-shelf area. The blank plate closes an unused wall point where a switch was removed; mount it flush and level so the rectangular plate sits square to the wall. Keep everyday items in view: a mug, neatly stacked documents, and a small tray. Ensure the plate remains the only modified wall element—no other outlets or plates are added or removed.
Product preservation:
Use the uploaded image as the exact manufactured product. You may change its position, uniform apparent scale, whole-object orientation and camera viewpoint. You must not change its design, mounting method, physical proportions, component shapes, relative sizes, counts, spacing, materials or finish. Perspective and scene lighting may change how it appears; they must not change what it is. Preserve all original construction details. Preserve the plastic white blank plate switch cover with dimensions 126mm by 80mm, its matte white finish, flush plate geometry, and fully blank face (no switch, no indicator, no extra cutouts beyond what exists on the reference product).
Environment details:
- Setting: compact kitchen-office hybrid corner with muted butter-yellow cabinet doors and a light cream countertop; incidental detail is a ceramic mug with visible fingerprints beside a folded notepad.
- Scale & installation: camera at countertop height (~0.9 m) angled upward slightly, showing the blank plate on the wall at typical switch height (~1,100 mm above floor); plate is aligned level, flush to the wall, with no hanging wires or unfinished installation tails visible.
Lighting:
- The product is non-illuminating; ambient daylight from a nearby window and soft interior fill creates a realistic shadow line around the plate edge. Ensure the plate reads as matte plastic against the painted wall.
- Use neutral photographic white balance with accurate material colours. Preserve the product's actual material colours, without an overall yellow/orange cast, sepia grading or a blue, green or magenta counter-cast. Keep the cabinet butter-yellow identifiable, but do not apply a global warm cast.
Mood:
Mid-morning focus—someone is preparing notes for the day, and the unused wall point looks safely finished.
Camera guidance:
- 800×800: close-medium framing with the plate prominent in the right third; camera about 1 m from the wall to avoid extreme wide-angle distortion, with cabinets and countertop providing scale.
- Sharp focus on the plate surface and edges; countertop and mug softly blurred but still recognisably real, with no over-smoothed plastic texture.
- Natural indoor exposure; keep white balance neutral and avoid clipping on bright cabinet highlights.
PROMPT 3 — Clean wall next to meeting room sign (corridor close-up)
Detail readability with true flush mounting
Prompt:
Capture a close, believable office wall detail featuring exactly 1 installed “White Indoor Blank Plate Switch Cover” directly beside a meeting room sign on a white/very light grey hallway wall. The blank plate should cover the unused switch opening and sit flush, with its long 126 mm dimension horizontal and its short 80 mm dimension vertical (unless the wall orientation requires a rotated but physically consistent placement through camera perspective—do not alter the plate design). Keep the surrounding wall text and sign legible enough for context, but do not add any other missing-switch repairs.
Product preservation:
Use the uploaded image as the exact manufactured product. You may change its position, uniform apparent scale, whole-object orientation and camera viewpoint. You must not change its design, mounting method, physical proportions, component shapes, relative sizes, counts, spacing, materials or finish. Perspective and scene lighting may change how it appears; they must not change what it is. Preserve all original construction details. Preserve the exact matte white plastic blank switch cover dimensions (126mm × 80mm) and its complete blank face—no added switch toggle, no indicator window, and no decorative recesses beyond the reference. Preserve the plate’s flush-front form and edge outline.
Environment details:
- Setting: quiet office hallway with light grey wall paint and a simple black meeting room sign; principal colour feature is the black sign on the off-white wall, incidental detail is a small stack of brochures tucked into a wall brochure holder.
- Scale & installation: camera close to the wall (about 0.8–1.0 m) with a slight oblique angle to show flush contact; mount the cover at ~1,150 mm above the finished floor, aligned level with the sign below it; no cable ends are visible and the plate remains tightly fitted.
Lighting:
- The product is non-illuminating; use soft ambient hallway lighting (diffused overhead light) producing gentle, realistic contact shadow where the plate meets the wall. The plate should not emit or glow.
- Use neutral photographic white balance with accurate material colours. Preserve the product's actual material colours, without an overall yellow/orange cast, sepia grading or a blue, green or magenta counter-cast. Keep the black sign neutral (not tinted) and show subtle wall texture.
Mood:
Before a meeting—clean signage and tidy wall finishes help the space feel orderly.
Camera guidance:
- 800×800: tight detail crop prioritising the switch cover, with just enough sign and wall edges to read scale; camera lens near-straight on (10–15° oblique) for accurate flush perspective.
- Focus lock on the plate face; maintain natural depth falloff so wall paint grain and sign edges are realistic without extreme blur.
- Keep exposure balanced so the white plastic shows its matte texture without over-bright clipping.
PROMPT 4 — Open-plan office workstation wall, cable-free finish
Worked-in office scene with tidy wall point
Prompt:
Create an open-plan office workstation corner showing exactly 1 installed “White Indoor Blank Plate Switch Cover” covering an unused wall point on the vertical wall behind a desk. The cover is mounted flush and level, positioned so it reads as a safe blanking plate where a switch used to be. Place it slightly left of a mounted cable trunk or wall-mounted organizer (do not alter those items), keeping the scene believable and not staged like a product shot. Include subtle, everyday clutter: a keyboard, a pen cup, and a single leaf of printed paper on the desk.
Product preservation:
Use the uploaded image as the exact manufactured product. You may change its position, uniform apparent scale, whole-object orientation and camera viewpoint. You must not change its design, mounting method, physical proportions, component shapes, relative sizes, counts, spacing, materials or finish. Perspective and scene lighting may change how it appears; they must not change what it is. Preserve all original construction details. Preserve the plastic white blank plate switch cover with length 126mm and width 80mm, its plain blank face, flush installation appearance, matte finish, and original plate edge outline. Do not introduce any switch mechanism or extra cutouts.
Environment details:
- Setting: open-plan office with warm off-white walls and a muted cool-grey desk surface; principal colour feature is a small pale teal desk mat or folder, and incidental detail is a pen cup with assorted pens.
- Scale & installation: camera at a slight side angle from the desk (~0.9–1.2 m), showing the wall behind; mount the blank plate at ~1,100 mm above the finished floor, directly behind the line of sight to the desk area. No visible wires or unfinished edges—plate fully flush to wall.
Lighting:
- The product is non-illuminating; show ambient office daylight with realistic shadow direction from overhead or nearby windows, keeping the plate matte and not glowing. Ensure restrained illumination so the white cover contrasts naturally with the wall.
- Use neutral photographic white balance with accurate material colours. Preserve the product's actual material colours, without an overall yellow/orange cast, sepia grading or a blue, green or magenta counter-cast. A soft, thin shadow under the plate edge should follow the ambient light.
Mood:
Focused work time—papers and tools are in use while the removed switch point is neatly finished.
Camera guidance:
- 800×800: medium shot with the desk and wall organizer in frame, placing the switch cover near the center-left; camera slightly above keyboard level for natural perspective.
- Focus on the blank plate while maintaining readable desk objects; keep believable depth of field and avoid artificial sharp outlines.
- Natural cropping that preserves accurate scale and shows the plate flush to the wall from a consistent perspective.
Choose Indoor Locations: Use only in indoor areas like offices or similar spaces for a suitable, finished appearance.
Cover Unused Openings: Place the blank plate over any unused wall opening where a switch was removed or a point moved.
Check Full Coverage: Confirm the plate fully conceals the opening with no visible gaps around the edges.
Align For Neat Finish: Position it straight and tidy to keep the wall looking finished and consistent.
Handle And Clean Gently: Handle carefully to protect the plastic, and wipe gently to remove dust when needed.
What is this blank plate used for?
It neatly and safely closes off an unused wall opening after you've removed a switch or moved a point, keeping the area looking finished.
Is this plate for indoor use only?
Yes, it has an IP20 rating, so it is for indoor use only.
What material is the plate made from?
It is made from plastic.
What are the dimensions of the plate?
The plate measures length 126 mm and width 80 mm.
What colour is the plate?
The plate is white.
If you’ve removed a switch, moved a point, or simply have an unused opening on your wall, this indoor blank plate is a neat, practical way to close it off safely and keep your space looking finished—ideal for clean, functional setups in offices and similar indoor areas.
This blank plate switch cover is a practical choice for finishing an unused wall point in a kitchen or office. Use it where a switch has been removed or relocated, such as beside a work area or along an office corridor. Its plain white finish helps the wall look consistent rather than leaving an open or unfinished position, making it a sensible indoor switch solution for tidy, functional spaces.
Specifications
- Material: Plastic
- IP Rating: IP20 – Indoor Use
- Dimensions: Length = 126mm, Width = 80mm
PROMPT 1 — Corridor wall blanking beside office door
Functional office detail in use
Prompt:
Create a believable South African office corridor scene with exactly 1 installed “White Indoor Blank Plate Switch Cover” closing an unused wall switch opening beside a door. The blank plate is fixed flush to the wall at typical switch height (around 1,100 mm above the finished floor), aligned level and centered to the removed opening. Include a narrow view down the corridor showing scale with skirting boards and door trim; no other wall openings are altered. Use a daylight-balanced look with subtle natural reflections on painted surfaces.
Product preservation:
Use the uploaded image as the exact manufactured product. You may change its position, uniform apparent scale, whole-object orientation and camera viewpoint. You must not change its design, mounting method, physical proportions, component shapes, relative sizes, counts, spacing, materials or finish. Perspective and scene lighting may change how it appears; they must not change what it is. Preserve all original construction details. Preserve the plastic white blank switch-plate cover with length 126mm and width 80mm, its flat flush face profile, clean edges, and the complete blanking plate geometry with no added switch parts.
Environment details:
- Setting: office corridor with muted off-white painted walls and light grey floor tiles; the main colour feature is a slightly dusty sage door edge/trim accent on one door, and an incidental detail is a lightly scuffed baseboard near the camera.
- Scale & installation: camera at about 1.6 m eye level, facing down the hallway so the plate is clearly readable; the switch cover is mounted flush to the wall beside the door at ~1,100 mm above the floor, with no visible cable tails, and no other fixtures changed.
Lighting:
- The product is non-illuminating (switch cover), so show only ambient office daylight from an off-frame window; keep the wall and plate naturally lit with gentle contact shadow only where the plate meets the wall. Use restrained exposure so the plastic texture and matte white finish are readable.
- Use neutral photographic white balance with accurate material colours. Retain the fitting's actual light colour and plausible local spill, without an overall yellow/orange cast, sepia grading or a blue, green or magenta counter-cast. A soft shadow edge under the plate should match the ambient light direction.
Mood:
Quiet daytime workday feel—someone has tidied a removed switch point so the hallway looks finished.
Camera guidance:
- 800×800 framing: medium close-up along the corridor wall, camera slightly oblique (about 20–30°) to show the plate flush and level, with door trim and skirting boards providing scale.
- Focus on the blank plate; shallow depth of field keeps the corridor doors soft while preserving crisp edge definition and true white colour.
- Natural cropping that keeps the plate unobstructed; no exaggerated lens distortion.
PROMPT 2 — Desk-side kitchen wall tidy-up
Practical close detail in a working corner
Prompt:
Photograph a lived-in office kitchenette workspace with exactly 1 installed “White Indoor Blank Plate Switch Cover” on a plain kitchen wall next to a small counter and under-shelf area. The blank plate closes an unused wall point where a switch was removed; mount it flush and level so the rectangular plate sits square to the wall. Keep everyday items in view: a mug, neatly stacked documents, and a small tray. Ensure the plate remains the only modified wall element—no other outlets or plates are added or removed.
Product preservation:
Use the uploaded image as the exact manufactured product. You may change its position, uniform apparent scale, whole-object orientation and camera viewpoint. You must not change its design, mounting method, physical proportions, component shapes, relative sizes, counts, spacing, materials or finish. Perspective and scene lighting may change how it appears; they must not change what it is. Preserve all original construction details. Preserve the plastic white blank plate switch cover with dimensions 126mm by 80mm, its matte white finish, flush plate geometry, and fully blank face (no switch, no indicator, no extra cutouts beyond what exists on the reference product).
Environment details:
- Setting: compact kitchen-office hybrid corner with muted butter-yellow cabinet doors and a light cream countertop; incidental detail is a ceramic mug with visible fingerprints beside a folded notepad.
- Scale & installation: camera at countertop height (~0.9 m) angled upward slightly, showing the blank plate on the wall at typical switch height (~1,100 mm above floor); plate is aligned level, flush to the wall, with no hanging wires or unfinished installation tails visible.
Lighting:
- The product is non-illuminating; ambient daylight from a nearby window and soft interior fill creates a realistic shadow line around the plate edge. Ensure the plate reads as matte plastic against the painted wall.
- Use neutral photographic white balance with accurate material colours. Preserve the product's actual material colours, without an overall yellow/orange cast, sepia grading or a blue, green or magenta counter-cast. Keep the cabinet butter-yellow identifiable, but do not apply a global warm cast.
Mood:
Mid-morning focus—someone is preparing notes for the day, and the unused wall point looks safely finished.
Camera guidance:
- 800×800: close-medium framing with the plate prominent in the right third; camera about 1 m from the wall to avoid extreme wide-angle distortion, with cabinets and countertop providing scale.
- Sharp focus on the plate surface and edges; countertop and mug softly blurred but still recognisably real, with no over-smoothed plastic texture.
- Natural indoor exposure; keep white balance neutral and avoid clipping on bright cabinet highlights.
PROMPT 3 — Clean wall next to meeting room sign (corridor close-up)
Detail readability with true flush mounting
Prompt:
Capture a close, believable office wall detail featuring exactly 1 installed “White Indoor Blank Plate Switch Cover” directly beside a meeting room sign on a white/very light grey hallway wall. The blank plate should cover the unused switch opening and sit flush, with its long 126 mm dimension horizontal and its short 80 mm dimension vertical (unless the wall orientation requires a rotated but physically consistent placement through camera perspective—do not alter the plate design). Keep the surrounding wall text and sign legible enough for context, but do not add any other missing-switch repairs.
Product preservation:
Use the uploaded image as the exact manufactured product. You may change its position, uniform apparent scale, whole-object orientation and camera viewpoint. You must not change its design, mounting method, physical proportions, component shapes, relative sizes, counts, spacing, materials or finish. Perspective and scene lighting may change how it appears; they must not change what it is. Preserve all original construction details. Preserve the exact matte white plastic blank switch cover dimensions (126mm × 80mm) and its complete blank face—no added switch toggle, no indicator window, and no decorative recesses beyond the reference. Preserve the plate’s flush-front form and edge outline.
Environment details:
- Setting: quiet office hallway with light grey wall paint and a simple black meeting room sign; principal colour feature is the black sign on the off-white wall, incidental detail is a small stack of brochures tucked into a wall brochure holder.
- Scale & installation: camera close to the wall (about 0.8–1.0 m) with a slight oblique angle to show flush contact; mount the cover at ~1,150 mm above the finished floor, aligned level with the sign below it; no cable ends are visible and the plate remains tightly fitted.
Lighting:
- The product is non-illuminating; use soft ambient hallway lighting (diffused overhead light) producing gentle, realistic contact shadow where the plate meets the wall. The plate should not emit or glow.
- Use neutral photographic white balance with accurate material colours. Preserve the product's actual material colours, without an overall yellow/orange cast, sepia grading or a blue, green or magenta counter-cast. Keep the black sign neutral (not tinted) and show subtle wall texture.
Mood:
Before a meeting—clean signage and tidy wall finishes help the space feel orderly.
Camera guidance:
- 800×800: tight detail crop prioritising the switch cover, with just enough sign and wall edges to read scale; camera lens near-straight on (10–15° oblique) for accurate flush perspective.
- Focus lock on the plate face; maintain natural depth falloff so wall paint grain and sign edges are realistic without extreme blur.
- Keep exposure balanced so the white plastic shows its matte texture without over-bright clipping.
PROMPT 4 — Open-plan office workstation wall, cable-free finish
Worked-in office scene with tidy wall point
Prompt:
Create an open-plan office workstation corner showing exactly 1 installed “White Indoor Blank Plate Switch Cover” covering an unused wall point on the vertical wall behind a desk. The cover is mounted flush and level, positioned so it reads as a safe blanking plate where a switch used to be. Place it slightly left of a mounted cable trunk or wall-mounted organizer (do not alter those items), keeping the scene believable and not staged like a product shot. Include subtle, everyday clutter: a keyboard, a pen cup, and a single leaf of printed paper on the desk.
Product preservation:
Use the uploaded image as the exact manufactured product. You may change its position, uniform apparent scale, whole-object orientation and camera viewpoint. You must not change its design, mounting method, physical proportions, component shapes, relative sizes, counts, spacing, materials or finish. Perspective and scene lighting may change how it appears; they must not change what it is. Preserve all original construction details. Preserve the plastic white blank plate switch cover with length 126mm and width 80mm, its plain blank face, flush installation appearance, matte finish, and original plate edge outline. Do not introduce any switch mechanism or extra cutouts.
Environment details:
- Setting: open-plan office with warm off-white walls and a muted cool-grey desk surface; principal colour feature is a small pale teal desk mat or folder, and incidental detail is a pen cup with assorted pens.
- Scale & installation: camera at a slight side angle from the desk (~0.9–1.2 m), showing the wall behind; mount the blank plate at ~1,100 mm above the finished floor, directly behind the line of sight to the desk area. No visible wires or unfinished edges—plate fully flush to wall.
Lighting:
- The product is non-illuminating; show ambient office daylight with realistic shadow direction from overhead or nearby windows, keeping the plate matte and not glowing. Ensure restrained illumination so the white cover contrasts naturally with the wall.
- Use neutral photographic white balance with accurate material colours. Preserve the product's actual material colours, without an overall yellow/orange cast, sepia grading or a blue, green or magenta counter-cast. A soft, thin shadow under the plate edge should follow the ambient light.
Mood:
Focused work time—papers and tools are in use while the removed switch point is neatly finished.
Camera guidance:
- 800×800: medium shot with the desk and wall organizer in frame, placing the switch cover near the center-left; camera slightly above keyboard level for natural perspective.
- Focus on the blank plate while maintaining readable desk objects; keep believable depth of field and avoid artificial sharp outlines.
- Natural cropping that preserves accurate scale and shows the plate flush to the wall from a consistent perspective.
White Indoor Blank Plate Switch Cover
- Regular price
- R 17.00
- Sale price
- R 17.00
- Regular price
-
R 29.00 - 41% OFF
Stock Availability
This is the available quantity currently recorded across our supplier warehouse network.
Some low-stock items may show availability but still be restricted at Add to Cart while we prevent overselling or confirm supplier allocation.
Confirm availabilityWhere stock is kept
- Stock is held at various Future Light and supplier warehouses around South Africa.
- Your order may need to be transferred or consolidated before it is dispatched.
- Availability can change as orders are placed, so stock is only allocated once your order is confirmed.
Need a large quantity or urgent confirmation? Contact our team and we’ll verify it for you.
Dispatch & Arrival Estimate
Current Order Timing
Accurate delivery estimates based on our real shipping data!
Shipping Costs
Orders below R1,500: R67 to R129.
Urgent Order? Contact our team and we’ll make a plan!
Delivery Times
- Estimated Delivery: 2–10 working days.
- Cape Town Collection: Yes – once confirmed.
- Farm Deliveries: PEP or PostNet collection points.
How the estimate is calculated
- Real Time Avg: 3.0 business days from order to dispatch. Updated Daily - Monday-to-Friday business hours only.
- Once dispatched, courier delivery adds another 1–3 working days.
Why your order may differ
- Multi-Supplier orders are held at different locations and will need to be consolidated first.
- Custom & Made-to-Order products may take longer.
Why Shop with Us?
- Trusted courier partners nationwide
- Free delivery on orders over R1,500
- Click & collect available in Cape Town
- Real-time parcel tracking
Important to know
- This is an accurate live indication, not a guarantee.
- Future Light shipping terms and delivery timelines still apply.
- Tracking details are sent once your order has been dispatched.


Join us on WhatsApp and get 10% off.
Join the Future Light WhatsApp community for quick product updates, lighting inspiration, helpful advice and exclusive offers.
You’re In!
Your 10% discount automatically applies at checkout - no codes needed!
Confirm stock before ordering.
Complete the form below and we will confirm the supplier stock with you before you place your order.
Check Out These Related Products
Featured Picks
-
Viko Rope Pendant Light


Viko Rope Pendant Light
- Regular price
- R 814.00
- Sale price
- R 814.00
- Regular price
-
R 1,239.00
-
Black Tall Ribbed Ceramic Table Lamp
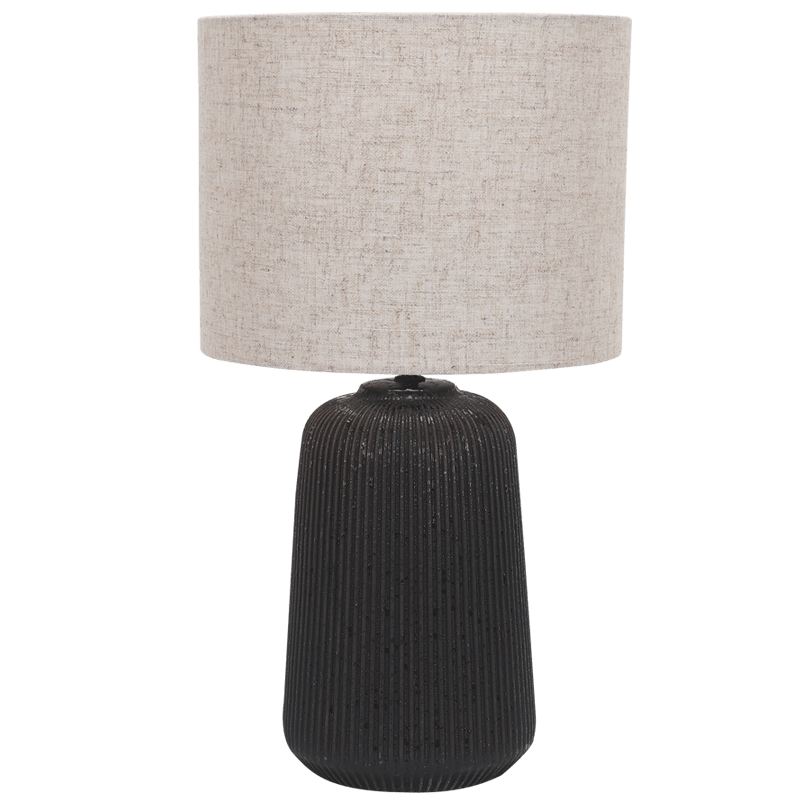

Black Tall Ribbed Ceramic Table Lamp
- Regular price
- R 863.00
- Sale price
- R 863.00
- Regular price
-
R 1,319.00
-
Lancer Satin Chrome & Wood Ceiling Fan


Lancer Satin Chrome & Wood Ceiling Fan
- Regular price
- R 2,741.00
- Sale price
- R 2,741.00
- Regular price
-
R 4,169.00
(1) -
LED Fairy Lights - 30M / Green Cable / Connectable / Warm White🔥


LED Fairy Lights - 30M / Green Cable / Connectable / Warm White
- Regular price
- R 476.00
- Sale price
- R 476.00
- Regular price
-
R 729.00
(1) -
Ellipse LED Wood Grain Pendant Light


Ellipse LED Wood Grain Pendant Light
- Regular price
- R 1,924.00
- Sale price
- R 1,924.00
- Regular price
-
R 2,929.00
-
LED Fairy Lights - IP65 Heavy Duty, White Cable, Warm White - 10 Meters🔥


LED Fairy Lights - IP65 Heavy Duty, White Cable, Warm White - 10 Meters
- Regular price
- R 1,021.00
- Sale price
- R 1,021.00
- Regular price
-
R 1,559.00


